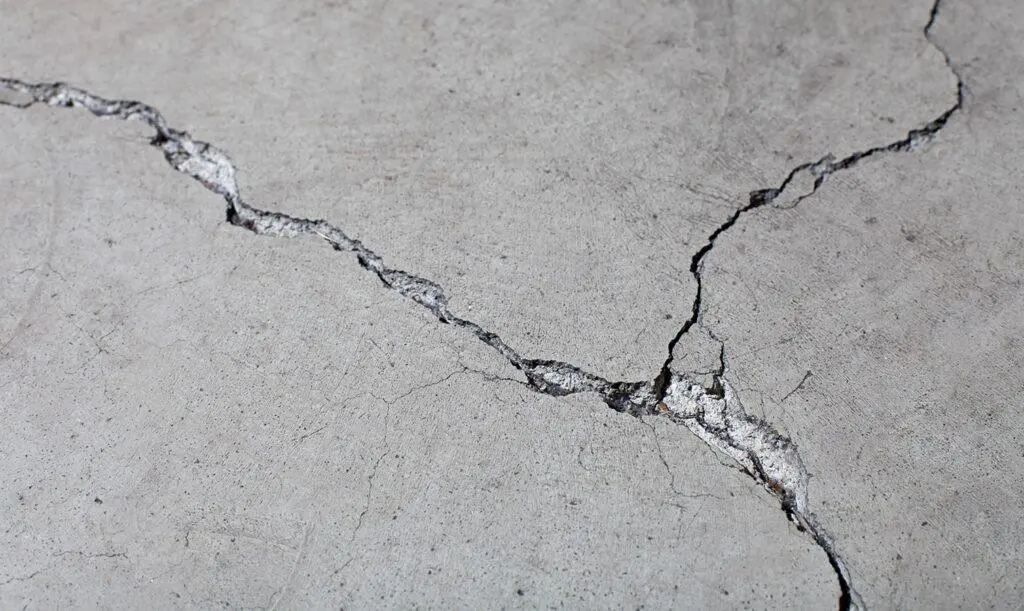
Cracked concrete is a common problem for homeowners. Left unrepaired, these cracks can worsen, leading to more extensive and costly damage. Look for changes in the concrete’s surface, such as developing cracks (even hairline ones), flaking or chipping (spalling), or noticeable sinking or unevenness. This guide provides a practical approach to concrete repair, empowering you to tackle those DIY projects with confidence. For more information on foundations, see our Concrete Foundation Guide.
Assessing the Damage
Before starting repairs, identify the type and extent of the damage. This helps determine the appropriate repair strategy. Accurately assessing the damage also helps you determine if the project is within your DIY capabilities or if it requires a professional. Knowing the underlying cause of the damage (e.g., tree roots, poor drainage) is crucial for long-term success and preventing recurrence. This guide will provide more detail on diagnosing those underlying issues.
Hairline Cracks
These are thin, superficial cracks that rarely pose a structural threat. They often result from surface shrinkage or minor settling. However, multiple hairline cracks in a concentrated area could indicate a deeper problem.
Wider Cracks
Cracks wider than a few millimeters may indicate more serious issues, such as foundation movement or significant settling. Measuring the width of the cracks over time can help determine if the problem is stable or worsening. This is important for understanding the severity of the issue.
Spalling
Spalling is the flaking or chipping of the concrete surface, often caused by freeze-thaw cycles or de-icing salts. The depth of the spalling is important to note as it influences the repair strategy. Deeper spalling may require more extensive repairs.
Sinking
Uneven sections or depressions in the concrete surface can be caused by soil erosion or compaction issues beneath the slab. Determining the extent and cause of the sinking is crucial for choosing the right repair method. Addressing the underlying cause is essential for a long-term solution.
While many concrete repairs are DIY-friendly, extensive cracking, significant structural damage, or complex issues are best left to experienced professionals. This guide will provide more information on when to call a professional. For larger projects, or if you’re unsure about tackling the repair yourself, a thorough understanding of the process and potential costs is essential. Our Free Concrete Repair Estimate Checklist provides a comprehensive guide to help you understand the scope of your project and prepare for professional consultations. Download the checklist today and gain clarity on your concrete repair needs. Leave your email below, and we’ll send you the checklist instantly. Plus, get a complimentary 15-minute consultation to review your concrete repair project.

Tools and Materials
Having the right tools and materials is essential for successful concrete repair. Using the correct products ensures a durable and long-lasting repair.
- Hammer and Chisel: For removing loose concrete. Different chisel sizes and types are available for various tasks.
- Wire Brush: For cleaning the surface. Different types of wire brushes exist (e.g., steel, brass).
- Safety Glasses and Gloves: Essential safety equipment. Additional safety gear, such as a dust mask and hearing protection, might be necessary depending on the project’s scope.
- Trowel: For applying and smoothing patching compounds.
- Bucket: For mixing.
- Concrete Mix: A high-quality, polymer-modified concrete mix is recommended for superior bonding and durability.
- Concrete Crack Filler: For hairline cracks, use a flexible, weather-resistant crack filler.
- Patching Compound: For larger cracks and holes, a patching compound like DAP or PC Products is suitable.
- Sealant: A concrete sealant protects the repaired area. A silane-siloxane based sealant offers excellent penetration and long-lasting protection.
Preparing the Area
Proper surface preparation is key to successful concrete repair. Thorough preparation ensures good adhesion of the repair materials.
- Remove loose debris, dirt, or vegetation using a wire brush.
- Rinse the area with water and allow it to dry completely.
Repairing Hairline Cracks
- Clean the crack with a wire brush.
- Apply the crack filler according to the manufacturer’s instructions, ensuring it fills the crack completely.
- Smooth the surface with a trowel or putty knife.
- Allow the filler to dry and cure according to the manufacturer’s instructions.
Repairing Wider Cracks and Spalling
- Chisel away any loose or damaged concrete around the crack or spalled area.
- Clean the area thoroughly with a wire brush and water.
- Mix the patching compound according to the manufacturer’s instructions.
- Apply the patching compound with a trowel, pressing it firmly into the crack or spalled area.
- Smooth the surface with a trowel, feathering the edges to blend with the surrounding concrete.
- Allow the patch to cure completely according to the manufacturer’s instructions.
Addressing Sinking Concrete
Sinking concrete often requires professional solutions like mudjacking or concrete leveling. These methods raise and stabilize the sunken concrete. If the sinking is minor, you might be able to patch the area with a concrete mix, but this is often a temporary fix. Professional solutions offer more permanent and effective results.
Sealing the Repaired Area
Once the repair is complete and fully cured, apply a concrete sealant to protect it from moisture and further damage. Follow the manufacturer’s instructions for application. This guide will provide tips for applying sealant effectively and achieving optimal protection. For a comprehensive guide to choosing the right sealant and ensuring its proper application, download our Free Concrete Repair Estimate Checklist.
Concrete Care
Regular maintenance prevents future concrete issues. Understanding the causes of concrete damage and implementing preventative measures can save you time and money in the long run. Preventative care is cost-effective in the long term.
Drainage
Ensure proper drainage away from concrete surfaces to prevent water accumulation.
Sealing
Regularly apply a high-quality sealant to protect against moisture and freeze-thaw cycles. Regular sealing extends the life of your concrete.
Conclusion
Regular maintenance, proper preparation, and knowing when to call in professionals are key to successful concrete repair. By following these guidelines, you can effectively repair and maintain your concrete surfaces.


